
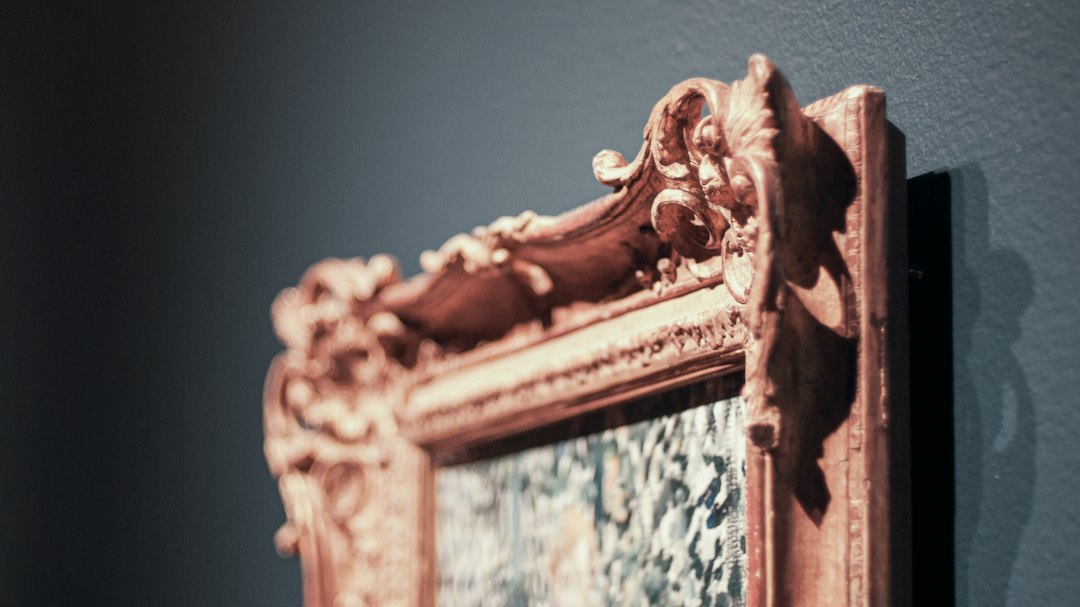
Restoring old picture frames can be a rewarding endeavor, breathing new life into cherished memories and heirlooms. These frames often carry stories of the past, encapsulating moments that deserve to be showcased in a manner befitting their significance. As time passes, however, frames can become worn, chipped, or outdated, detracting from the beauty of the artwork or photographs they hold. By undertaking the restoration process, individuals not only preserve these artifacts but also enhance their aesthetic appeal, allowing them to shine in contemporary settings.
The art of frame restoration is not merely about aesthetics; it is also an act of preservation. Many old frames are crafted from quality materials that are no longer readily available, making their restoration all the more important. Whether it’s a gilded frame from the Victorian era or a simple wooden frame from the mid-20th century, each piece has its unique character and charm. Through careful restoration, one can maintain the integrity of these items while adapting them for modern use, ensuring that they continue to tell their stories for generations to come.
For those interested in enhancing their home decor with vibrant touches, the article “Ghid complet de restaurare a ramelor de tablouri vechi cu spray-uri colorate” offers a comprehensive guide on restoring old picture frames using colorful sprays. This technique not only revitalizes the frames but also adds a unique flair to your artwork. Additionally, you may find inspiration in a related article that discusses creative ideas for decorating a colorful nursery, which can be found at Tips for Decorating a Colorful Nursery.
Tools and Materials Needed for Restoration
Before embarking on the restoration journey, it is essential to gather the necessary tools and materials. A well-equipped workspace can make all the difference in achieving a successful outcome. Basic tools include a soft cloth for cleaning, sandpaper for smoothing surfaces, and a paintbrush for detailed work. Additionally, a utility knife can be handy for removing old paint or any damaged sections of the frame. For those who prefer a more hands-on approach, wood glue may be required to repair any cracks or separations in wooden frames.
In terms of materials, selecting the right type of paint is crucial. Spray paint is often favored for its ease of application and smooth finish. However, one must also consider primers and sealants to ensure longevity and durability. Depending on the desired finish, decorative elements such as stencils or gold leaf may also be included in the toolkit. By assembling these tools and materials beforehand, individuals can streamline the restoration process and focus on bringing their vision to life.
Assessing the Condition of Your Picture Frame
A thorough assessment of the frame’s condition is a vital first step in the restoration process. This evaluation allows individuals to identify specific areas that require attention and determine the best approach for restoration. Inspecting the frame closely will reveal any cracks, chips, or peeling paint that may need repair. Additionally, it is important to check for structural integrity; a frame that is unstable may require reinforcement before any cosmetic work begins.
Once the initial inspection is complete, it is beneficial to document the frame’s condition with photographs or notes. This record can serve as a reference throughout the restoration process and help track progress. Understanding the frame’s history—such as its age and previous repairs—can also inform decisions about how to proceed. By taking the time to assess the condition thoroughly, individuals can ensure that their restoration efforts are both effective and respectful of the frame’s original character.
Preparing the Frame for Painting
Preparation is key when it comes to painting an old picture frame. The first step involves cleaning the frame to remove dust, dirt, and any old finishes that may interfere with paint adhesion. A gentle cleaning solution can be used along with a soft cloth to avoid scratching delicate surfaces. For frames with intricate details or crevices, a soft brush may be necessary to reach those hard-to-clean areas.
After cleaning, sanding becomes essential for achieving a smooth surface. Using fine-grit sandpaper, individuals should carefully sand down any rough spots or peeling paint. This process not only helps create an even surface for painting but also allows new paint to adhere better. Once sanding is complete, it is advisable to wipe down the frame again to remove any dust particles created during this process. Proper preparation sets the stage for a successful painting experience and ensures that the final result is polished and professional.
In the quest to restore old picture frames using colorful sprays, it’s essential to consider various techniques that can enhance the overall aesthetic of your artwork. For those looking to expand their creative horizons, a related article offers valuable insights on how to create vibrant and eye-catching artwork. You can explore these tips further in this informative piece, which complements the restoration process by providing inspiration for incorporating color into your projects.
Choosing the Right Colored Spray Paint
Selecting the right color of spray paint can significantly impact the overall look of the restored picture frame. The choice should reflect both personal taste and the intended decor of the space where the frame will be displayed. Neutral colors like white, black, or gray offer versatility and can complement various styles, while bold colors can make a statement and serve as a focal point in a room.
When choosing spray paint, it is also important to consider the finish—matte, satin, or glossy—each offering a different aesthetic appeal. Matte finishes provide a more understated look, while glossy finishes can add vibrancy and depth to colors. Additionally, individuals should opt for high-quality spray paints designed for use on wood or metal surfaces to ensure durability and longevity. Testing a small area before committing to a color can help avoid any regrets later on.
In the process of restoring old picture frames with colorful sprays, it’s essential to consider the overall aesthetic of your space. A related article that offers valuable insights on incorporating vibrant colors into your decor is available at Tips for Creating a Colorful Party Theme. This resource can inspire you not only in your restoration project but also in enhancing the ambiance of your home with lively themes and color combinations.
Techniques for Applying Spray Paint Evenly
Achieving an even coat of spray paint requires some technique and practice. First and foremost, individuals should ensure they are working in a well-ventilated area to avoid inhaling fumes and to allow for proper drying. Holding the spray can approximately 6-12 inches away from the surface helps prevent drips and uneven application. It is advisable to apply multiple thin coats rather than one thick coat; this approach not only enhances coverage but also reduces the risk of runs.
When spraying, individuals should use smooth, sweeping motions from side to side or up and down, overlapping each pass slightly to ensure even coverage. It is beneficial to rotate the frame as needed to reach all angles without having to stretch or twist awkwardly. Allowing adequate drying time between coats is crucial; rushing this step can lead to smudges or uneven textures. By mastering these techniques, individuals can achieve a professional-looking finish that enhances the beauty of their restored frame.
Tips for Achieving a Vintage or Antique Finish
For those looking to create a vintage or antique finish on their restored picture frames, several techniques can help achieve this desired effect. One popular method involves distressing the paint after it has dried completely. This can be done by lightly sanding certain areas with fine-grit sandpaper or using a damp cloth to rub away some of the paint in spots where natural wear would occur over time.
Another technique involves layering different colors of paint before distressing. For instance, applying a base coat of a darker color followed by a lighter top coat can create depth and dimension when distressed. Additionally, using antiquing wax or glaze can enhance details and give an aged appearance without compromising the integrity of the paint underneath. These methods allow individuals to customize their frames further while adding character that reflects their personal style.
Adding Decorative Details and Accents
Once the primary painting is complete, individuals may wish to enhance their restored frames with decorative details and accents. This could include adding stencils or decals that reflect personal interests or themes relevant to the artwork being displayed. For example, floral patterns might complement a nature-themed photograph, while geometric designs could suit modern art pieces.
Gold leafing is another popular option for adding elegance and sophistication to picture frames. Applying gold leaf along edges or in intricate designs can elevate an otherwise simple frame into a stunning piece of art itself. Additionally, embellishments such as beads or ribbon can be incorporated for added texture and visual interest. These decorative elements allow individuals to express their creativity while ensuring that their restored frames stand out as unique pieces in any setting.
Sealing and Protecting the Painted Frame
To ensure that the restored picture frame remains beautiful over time, sealing and protecting it is essential. A clear sealant can provide an extra layer of protection against scratches, moisture, and fading from sunlight exposure. When selecting a sealant, individuals should choose one compatible with their chosen paint type—whether it be water-based or oil-based—to ensure proper adhesion.
Applying sealant should be done carefully; using a clean brush or spray application can help achieve an even coat without disturbing the underlying paintwork. It is advisable to allow sufficient drying time before handling or displaying the frame again. Regular maintenance checks will help identify any wear over time so that touch-ups can be made as needed, preserving both beauty and integrity.
Troubleshooting Common Issues During Restoration
Throughout the restoration process, individuals may encounter common issues that require troubleshooting. One frequent problem is paint drips or runs caused by applying too thick of a coat or spraying too closely to the surface. If this occurs, it is best to allow the paint to dry completely before gently sanding down any imperfections and reapplying an even coat.
Another issue might arise from uneven color application due to inadequate coverage or poor lighting conditions during painting. In such cases, additional coats may be necessary to achieve uniformity; however, patience is key—rushing this step could lead to further complications down the line. By remaining vigilant and adaptable throughout each stage of restoration, individuals can navigate these challenges effectively while ensuring their frames turn out beautifully.
Final Touches and Displaying Your Restored Frame
As restoration nears completion, adding final touches can elevate the overall presentation of the picture frame. This might include inserting new backing material if necessary or replacing old hardware with fresh hooks or hangers that match the updated aesthetic. Ensuring that everything fits snugly will not only enhance stability but also contribute to a polished look.
Once all adjustments are made, displaying the restored frame becomes an exciting opportunity for showcasing creativity and craftsmanship. Whether hung on walls as part of an art gallery display or placed on shelves among other treasured items, restored frames serve as conversation starters that reflect personal history and artistic expression. By taking pride in their work and sharing these restored pieces with others, individuals celebrate both their efforts and the stories encapsulated within each frame.


